Thursday, 28 April 2011

Bright & Cheery Birthday Card

Hi, hope everyone is well!

For this Bright and Cheery Birthday Card, I mainly used cardstock from the DCWV Citrus Stack, then just a snippet of some Dovecraft Designer Paper for the yellow scalloped trim. The main flowery panel and bottom stripey panel have a lovely glittery finish, and I just love the colours! I began by cutting all the pieces I would require, I then stamped the sentiment using Versamark and embossed with red embossing powder. I adhered the bottom panel directly to the card, I then assembled the main panel by glueing the red stripey strip straight onto the glitter cardstock, I attached the yellow scalloped trim to the back of the cardstock using foam pads and also the orange sentiment panel to the front using foam pads, I then adhered this whole panel to the card.


I would like to enter this card into the following challenges:
Pear Tree Designs - "Colourful"

Wednesday, 27 April 2011

Chocolate & Cream, Vintage Style Tilda Card

I've been waiting to get time to have a play with these lovely printable papers from Stamping All Day's download site for a while now, and I finally had time to use some of them, and I love them!

First of all I cut and punched all of the various layers I would need, I then used Brilliance Pearlescent Ink in Galaxy Gold and Cosmic Copper to lightly sponge the very edge of all of the layers. I sponged the fancy circle more heavily to give a lovely golden finish. I had already coloured Tilda in co-ordinating colours and cut her out in anticipation of using the new papers, so I then got straight on with sticking all the layers together, adding the flowers, lace, ribbon and pearls to finish. I also added the Brilliance Inks to the flowers to glitz them up a bit. You may notice I used one of my new Marianne Creatables butterfly dies too, I punched this out of white card and coloured using promarkers and again edged with Brilliance inks and added some pearls to the body.


I would like to enter my Chocolate & Cream Tilda card into the following Challenges:
Just Magnolia - "A Sketch"
One Stop Craft Challenge - "Chocolate Inspired"
Stamptacular Sunday - "Pile it On"
Totally Gorjuss - "Bling it On"
Pink Gem Challenge - "Pearls & Swirls"
Crazy Challenge - "Different Patterned Papers"
Sparkles Forum Challenge - "Anything Goes"

WOYWW

Hi all fellow WOYWWers.. and Hi to anyone else who might be stopping by.

Here we are, another Wednesday, this one seems to have come round super fast with the couple of days off work for Easter, so, lets see what left on my desk after having a bit of extra time for crafting this weekend...

New things :o) some Marianne Creatables butterfly dies, really pleased with these, they're soooo cute, haven't got round to using them all yet, although you will see I have cut one of each to see how they turned out and they're great! Also some Sizzix Corner Accents, I had been told these worked fine with the Cuttlebugs, but a couple don't seem to want to cut that clearly :o( Not sure if I'm using the wrong plates, I'm using 2 B plates as the dies seem a similar thickness to Cuttlebug dies, I have tried shimming with some card and this helps with the cut but I'm worried this will damage my Cuttlebug as it makes the handle really tough to turn.... someone has told me to try using my C plate but that would be really hard to crank through so daren't try that! anyone else had this problem with these?? It's a shame really I was looking forward to using them...

An almost finished Tilda card, which I will post details of later today as it is so very nearly done so I'm going to add the finishing touches as soon as I've completed this post. I've been using some lovely patterned paper from Stamping All Day's printable downloads site, have had these for a while but have just got around to printing them out and using some of them. I got the Shabby Green and Shabby Brown Beige paper packs, I've been using the brown ones on this card.

Think that's about all for this week, I'll pop over to Julia's later today to have a look what everyone else is up to.

Have a great day!

Sunday, 24 April 2011

Puppy Birthday Card for Sister

Hi all,

Hope everyone is enjoying their Easter weekend! I have been making the most of a bit of extra time at home and have made this cute birthday card for a friend, she asked if I could make her a birthday card for her sister which had a black puppy on it. The only digi stamp I had was this one with 3 puppies but I think it has worked well.

I coloured the puppies digi stamp using promarkers then cut it out. I then prepared 3 various sizes circles ready to layer up, the largest circle I edged with Diamond Stickles and the smallest circle I sponged the edges using Brilliance Pearlescent Orchid ink, I then layered these and various other co-ordinating papers and card to create the final layout, I am loving these Dovecraft Back to Basics papers at the moment, perfect Spring colours! I added ribbon for the puppies to be peeping over and a sentiment tag which was cut and embossed using a Nestabilities Labels 14 die, stamped using Brilliance Pearlescent Orchid ink and I added a Sister peel off. I lightly sponged the edge of the tag to finish it off and added some lemon coloured pearls.


I would like to enter this into the following challenges:
Creative Inspirations - "Pets & Animals"
Crafty Creations - "Easy as 1, 2, 3"
Pink Gem Challenge - "Pearls & Swirls"
The Crafty Pad - "Circles"
Creative Inspirations - "Digi Day"
Fussy & Fancy - "Springtime"
Sparkles - "Anything Goes"

Thursday, 21 April 2011

90th Birthday Card

I have made a card for my Boyfriend's Grandma's 90th Birthday. Wow 90! can you believe! so I thought I'd try and make a special card for her.

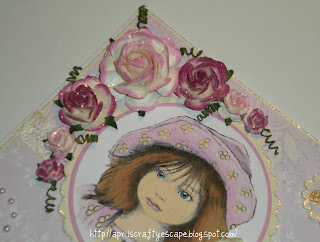
I used a Sugar Nellie image of Faith and coloured her with Promarkers. I then layered the image up on some co-ordinating cardstock. The backing paper is a printable one which I think came from the Cardmaking and Papercraft website as I couldn't find anything subtle enough in my stash. I stamped the "90" motif using Versamark and embossed in gold. I used some Vintage Seam binding ribbon and added a little butterfly from my jewelry findings. I glitzed up some Mulberry roses using Diamond Stickles and trimmed pretty much everything else up with it too. I then created some swirl flourishes using pearls to finish it off. I'm really pleased with it and hope it will make her day!


I would like to enter this into the following challenges:
Cupcake Craft Challenges - "Lots of Layers"
My Mum's Craft Shop Challenges - "All That Glitters"
A Spoonfull of Sugar - "Let's Celebrate"
A Gem of a Challenge - "Pearly & Swirly"
Top Tip Tuesday - "Open Challenge"
ABC Challenge - "S is for Sparkle"

Wednesday, 20 April 2011

Cute Easter Card No2

Here is another Easter card I have created using the cute digi stamp from Sliekje's Digi Stamps, the card is similar to the one posted below, but I thought I'd try a grey bunny suit this time so I coloured the bunny suit by blending Cool Grey 1 and 2 Promarkers and various others for the rest of the image, I lightly shaded around the image using some Derwent water colour pencils and lightly blended them with a damp paintbrush.

The lovely pastel backing papers are from Dovercraft's Back to Basics collection. I then just used some lemon cardstock to mount the image onto which I trimmed with Diamond Stickles. I punched a border section from white card using a Martha Stewart border punch then embossed the solid section. I used a Nesties Labels 14 die to cut the sentiment which I adhered to the card using foam pads. I then added some pearls to finish it off.


I would like to enter my Cute Easter Card into the following challenges:
Daring Cardmakers - "Spring Fling"
Catch the Bug - "Easter"
Dream Valley - "Easter"
Pear Tree Designs - "Easter"

Cute Easter Card No1

Here is an Easter card I have created using a cute digi stamp from Sliekje's Digi Stamps, I love this image it's soooo cute! I coloured the bunny suit by blending Ivory and Caramel Promarkers and various others for the rest of the image, I lightly shaded around the image using some Derwent water colour pencils and lightly blended them with a damp paintbrush.

The lovely pastel backing papers are from Dovercraft's Back to Basics collection. I then just used some lemon cardstock to mount the image onto which I trimmed with Diamond Stickles. I punched a border section from white card using a Martha Stewart border punch then embossed the solid section. I used a Nesties Labels 14 die to cut the sentiment which I adhered to the card using foam pads. I then added some pearls to finish it off.


I would like to enter my Cute Easter Card into the following challenges:
 The Crafty Pad - "Easter"
Pink Gem Challenge - "Pearls & Swirls"
Crafty Catz - "Furry Friends"
My Time to Craft - "Easter"
Die Cut Dreams - "It's Easter Time"
Paper Take Weekly - "Spots n Stripes"

WOYWW

Hi everyone,

Here it is.... Wednesday again, although this week we're just 1 day closer to the weekend than normal (for those who have got a 4 day weekend to look forward to) which I am one of those lucky people so BIG SMILES!!

This week I have to admit I have had to tidy my desk a little before taking my pic for the crafty world to see as to be honest if I hadn't there wouldn't have been much for you to see at all, other than just a heap of craftyness mess! So now I have tidied up a little you will see........ a Cuttlebug, that I wasn't going to get (as hammering away with a rolling pin and my sizzix hammer did a good enough job??!!! kind of - all be it slow and unpredictable oh and very noisy!) I have in the end crumbled and got one, I've only had it a week and wonder how I lived without it :o) keen eyes may notice it's not a V2, however I got a great deal over at Dottie 4 Crafts and with free next day delivery they provide a great service.

Also on my desk are 2 Easter Cards which I have just finished and will hopefully get chance to post pictures and info today or tomorrow. There's also the two cards you may recall I had started last week for my friend to pick from for her Fiance' birthday, they're a bit further on this week, I'm just waiting to see which one she likes the look of before finishing one off for her and whichever she doesn't choose I will finish for a general male birthday card. Quite pleased with how they're looking so far so once they're complete I will post some piccies.

Think that's about it for my rather cluttered WOYWW, hopefully next week after a nice long weekend I will have found a permanent home for my Cuttlebug as he can't live on my little desk forever and I may well have finished those male cards!

If your reading this it's likely you have come over from Julia's but if you have just happened to come across my blog and wonder why on earth I'm showing you my desk then take a look at WOYWW on Julia's blog and see what it's all about!

Tuesday, 19 April 2011

Spring Colours Birthday Card

With the lovely sunny weather we've been having I decided to make a birthday card in some "Sunny Spring" colours.

I started by colouring in a Tilda image in using various yellow tone promarkers, I then cut her out ready to use. I chose some co-ordinating paper from my stash. The lovely glittery flower cardstock is from DCWV Cirtrus Stack. I added a With Love sentiment which was stamped using Versamark and detail silver embossing powder, the cute little stamp is from Stamping All Day. I cut the paper lace doilie and trim using a Multi-Punch and the Swirly accent was cut using a Marianne Creatables die. I added some Mulberry paper flowers, ribbon and pearls to finish it off nicely.


I would like to enter my "Spring Colours Birthday Card" into the following challenges:
Just Magnolia - "Happy Birthday"
Stamptacular Sunday - "MAGNOLIA-licious"
Total Papercrafts - "Spring Time"
Pink Gem Challenge - "Pearls & Swirls"

Thursday, 14 April 2011

Easter Treat Box

Hi Everyone,

Well this is a first for my blog - It's NOT a card! Thought I'd give a box a go to hide some Easter Treats inside for a lucky recipient! Although the treats have come dangerously close to being eaten by me on more than one ocassion :o)

I began by cutting out and scoring 3 box bases, starting with the largest then cutting the next slightly smaller and then one smaller again. I then cut and scored a lid to fit over the largest base. Before assembling the boxes and lid I cut various patterned paper to fit the panels and stuck them onto each panel, I also added a peel off sentiment to the front panel of the lid. Once I had covered all of the panels I stuck the 3 box bases together by their bottom panel and assembled the lid.

I then layered up some flower die cuts and attached those to then ends of some thin strips of acetate, I then attached the other ends of the acetate to the inside of the smallest box's panels using some co-ordinating border strips. I created a fan style flower for the lid using some glittery cardstock from the DCWV Glitter Stack, before scoring the card I cut one edge with a scallop border punch then scored at the inner cut of each scallop so that when folded the fan would have a rounded edge to each folded section. I then finished this off with a couple of punched circles and a 12mm Dotty Pastel Brad from Dovecraft.

At this stage I thought I had finished my box however I then realised I needed to put something in the center to hold those little treats! so I again cut and scored a box base, slightly smaller than the last but I cut it so the sides were taller than I required so i could then use my scallop border punch again to finish what would be the top edges of the box. Before assembling the little box I again added some patterned paper. Then it was finally ready for the yummy treats!


I would like to enter my Easter Treats Box into the following challenges:
Papertake Weekly - Truly Dimensional

Wednesday, 13 April 2011

WOYWW - 2nd One for Me!

Hi everyone,

Is it really Wednesday again??!! it must be as we're all posting our WOYWW links over at Julia's Stamping Ground.

So here is my desk today. You will see this week I have broken into those new Dovecraft Charcoal Prints papers that were waiting to be opened last week, I also decided to get the DCWV Black and White Prints pack too. My friend has asked if I'd like to do her a card for her Fiance' birthday next month, so considering I always find men's cards a little tricky I have started 2 to see how I get on! So we'll see, if they turn out well i will be posting them for you to see if they don't I won't :o) so see what crops up on here over the next few weeks to see if they turned out well or not!


You may notice the 2 cards propped up at the back haven't progressed much..... erm well.... not at all infact but they're just waiting for my inspiration to come back with those and they'll get finished. Acouple of people mentioned last week about the mirror at the back of my desk being a nice idea, well, i have a little confession to make there, my desk is in the corner of our spare bedroom and is supposed to be a dressing table for guests however I have kind of taken over it with one or two of crafting essentials ;o) but it's not like we have that many guests to stay over so it won't matter too much! so that explains the mirror. That's about all for this week.

Tuesday, 12 April 2011

Girly Pearly Card

Hi Everyone.

Back to pretty and girly after a doing few clean and simple cards posted below, I like to mix it up a bit!

I have made this card using a Sugar Naillie "Faith" Stamp which I coloured with Promarkers. Then layered up some Prima flowers and added a couple of swirl flourishes using individual flat backed pearls. The With Love sentiment is a lovely little stamp from Stamping All Day which I stamped using Versamark and embossed with a detail silver embossing powder, I surrounded the little heart sentiment with more flat backed pearls forming a trail down to the ribbon.


I would like to enter this card into the following challenges:
Totally Stampalicious - "Anything Goes"
Catch The Bug - "Four or More Layers"

Monday, 11 April 2011

Spring Colours

Hi everyone.

I decided to create a brighter version of my "More Manly" card (see below) to enter into The Crafty Pad's "Spring" challenge.

I used glitter card stock from the DCWV Citrus Stack for the main panel and trimmed using co-ordinating blue card also from the Citrus Stack and pealescent lime green textured card from a Jewel card pack which I punched using an X-Cut border punch to finish it off. The Happy Birthday sentiment was stamped using Brilliance Galaxy Gold and Lightning Black. I layered up a couple of Prima flowers and finished with a flat backed pearl for the embellishment.

Here's how it turned out


Saturday, 9 April 2011

A Bit More Manly.......

Hi all.

As i've said before I tend to struggle a bit with cards for Men, but I think this one has turned out quite well. The main panel of glittery card is from my much loved DCWV Glitter Mat Stack, I punched a 1 3/4" hole towards one end ready for the embellishment. I then cut a strip of grey paper and glued directly to the card I then stamped the sentiment using Brilliance Starlight Black ink so that the "happy" went on the card and "birthday" went on the grey paper. I then cut a strip of black paper which I punched one edge using an X-Cut border punch, I then attached that to the back of the main card panel. Using double sided foam I attached the glittery panel with the black trim to the card. For the embellishment I used a silver peeloff stuck onto some white card, I cut around that and coloured it in with a poppy Promarker and coloured over that using a Clear Sakura Stardust pen. I then attached that directly to the card using double sided foam.


I have entered this into One Stop Craft Challenge this week for their "Monochrome" theme

Thursday, 7 April 2011

50th Birthday Card

I was asked to make a 50th Birthday card by a friend of my Mum's, the basic requirements were, bright colours, 50th and Auntie. So this is what I came up with, I had originally planned to use 2 flowers in the design but i couldn't make up my mind how to work in the "50" so I decided to make a fan type flower and stamp the figure 50 using Brilliance Galaxy Gold onto a small disc to create the center. All the card stock is from the DCWV Citrus Stack, the scallop trim was cut from Dovecraft Designer Paper using an X-Cut border punch. I glitzed the flower up with a little Diamond Stickles and finished it off with a 5mm flat back pearl.


I will enter this in the Crazy Challenge this week as it fits with their "flowers" theme!

Wednesday, 6 April 2011

WOYWW Newbie

Hi everyone,

Since i've just set up my blog I thought I would take part in WOYWW I first learned of this weekly ritual when visiting Spyders Corner and really enjoyed reading about what she was up to. So here's some pics of my "cosy" crafty desk. It's actually in a reasonably tidy state at the moment! You'll see I'm currently working on a 90th Birthday card, this is for my boyfriends Grandma, I'll be posting detailed photos of this when it's finished, it's nearly there now!


Propped up at the back of my desk there are 2 Fathersday / Male cards that I have started but lost my way a bit so will have to get my thinking cap on with those! I always struggle with the "male" themed ones. You will also see my Martha Stewart Punch around the page "Double Loops" set, I decided to treat myself to this a couple of weeks ago, I love it! the punching around the verse for the card is the first time I have used it on a project and am so pleased I got it, think i'll be saving up for another of those sets!


On the floor you'll see my box of card and paper stock, the Dovecraft Charcoal prints that are on top are my most recent purchase, again I'm hoping they give me some inspiration for some male cards!


Think thats about it for now. Please have a browse through my earlier posts, I'd love to hear any comments about my cards, more followers are always welcome too ;) I will be updating regularly! remember if you would like to take part in WOYWW hop over to Julia's Stamping Ground


Tuesday, 5 April 2011

Cute Thank You Card

For this super cute thank you card I used a lovely digi stamp from Stamp Fairy coloured with Promarkers. Then layered him up on some plain card which I have embossed using a Crafts Too "Spots" Embossing Folder. To cut circles I use a Martha Stewart Circle Cutter, I find this a really useful tool, however a tip from me is to use low tack tape just to fix the card that you are cutting down as I find sometimes the card can slip and you get a "wonky" circle! oh, and don't press too hard with your cutting tool as it will dig into your mat and keep getting stuck, took me a while to get used to it but once I did I loved it! I finished the card off with some further embossed card which I cut a scalloped edge using an X-Cut Scallop Border Punch and some Prima flowers, I then added the thank you sentiment using a small Peel Off. I really love this digi stamp, he's soooo cute!


I think I will enter this into The Crazy Challenge as it goes with their "flowers" theme. Over at Top Tip Tuesday their theme is "Thank You" And also at Papertake Weekly as over there it's "Anything Goes"!

Sunday, 3 April 2011

Mother's Day Card No's 3 & 4

Happy Mother's Day to all Mum's out there!

To finish off the Mother's Day theme for this year here are the two cards I have made for my Mum.

This one is my first attempt at an easel card, decades behind everyone else I know, but finally got round to giving one a go. The background paper is from Dovecraft's Back to Basics selection, the glittery daisy design card stock is from the DCWV Citrus Stack. I have used Mulberry paper flowers to frame the "Tilda with Big Ribbon" image and used Promarkers to colour her in. Both the Happy Mother's Day and With Love sentiment stamps are from Stamping All Day, and were stamped using Versamark and detail silver embossing powder. Almost everything has been given an extra bit of glitz using Diamond Stickles, and the little silver butterflies are from my jewelry findings stash. I have used the Marrianne Designs Creatables Swirl Circle Die for the flourish on the card front and used flat back pearls to create flourishes on the base to give it that extra special finish.

I am so pleased with how this card turned out, i know my Mum will love it! I am going to enter it into the following challenges:

The Cute & Girly for their "Cute & Girly" challenge
Allsorts Challenge for their "Blooming Blossoms" theme
Magnolia Downunder Challenges for their "Heavy Metal" challenge
The Crafty Pad for their "Flowers" challenge


This one is a colour variation to the one in my previous post..... just using some different colour options from the DCWV Citrus Stack.


Saturday, 2 April 2011

Mother's Day Card No2

Another Mother's Day card, this one I made for a friend to give to her Mum.

The the glittery flower and dotty card stock are from the DCWV Citrus Stack. I cut a large part circle from the corner of a piece of card then punched out several co-ordinating circles using a 1 3/4" circle punch, I attached those to the back of the part circle so I could trim them off to suit. I hadn't intended on using a flower on this card but it looked a little plain without so layered up some Prima's to finish it off, If I had used a more heavily patterned paper for the backing and perhaps a plainer paper for the part circle it wouldn't have needed the flower to finish it off, but I think it looks good. I used my Stamping all Day Happy Mother's Day stamp with Versamark and some detail silver embossing powder for the sentiment and a silver gel pen just to fininsh it off nicely. I'm really pleased with how this card turned out, think I will do another one in oranges and yellows, will post soon.